


Results 1 to 1 of 1
-
24th Nov 2011, 05:50 PM#1


 OPBannedWebsite's:
KWWHunction.com Backup/restore using phpMyAdmin/SSH
This is just a short mini-tutorial explaining how to backup parts of the mySQL database using phpMyAdmin and also via SSH (Secure Shell) access. This tutorial should be of use to most people, as it's an important part of any website/forum maintenance.
So, let's get started...
Step 1 - Backing up using phpMyAdmin
Note: Most good hosts provide phpMyAdmin (mySQL administration). If you do not know where it is or even if it exists on your server, just get in touch with your host.
- Login to phpMyAdmin.
- Select the database you wish to use.
- On the navigation bar on the top, select "Export" (besides SQL, Structure, Search, Query... etc.)
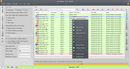
- You should now be presented with a nifty little page which shows all the tables in the database, SQL Options and Save Types. *
- To backup the whole database, click "Select All" under the list of tables in the page.
- To backup a selected few, just hold down CTRL on your keyboard and select the tables you wish to backup (release the key when all selecting is done).
- SQL Options can be left as default, but I suggest ticking the "Add DROP TABLE" option as if you are restoring a backup on a database that already exists and has the table in it - you will get a lot of errors! This way, by ticking the "Add DROP TABLE" option you will avoid the errors. For more information on the options just click the little "?" icon after SQL Options.
- If you want to save the backup as a file (recommended) then tick "Save as file" - Leave file name as is or edit for your needs. Select "gzipped" as compression. Now click "Go". If asked, choose "Save to disk" and save it wherever on your computer (it may take sometime depending on the size).
- If you want to show the whole backup SQL on your browser window, don't tick "Save as file" - once you have selected the tables you wish to backup (explained in step 5/6) click "Go". The page will now change and should show the SQL information (it may take sometime depending on the size). Copy and paste it to a text file or do whatever you want with it!
Note: Yes, the tables of the database will be shown to the far left in a frame, but they will also be displayed in a different form on this new page to the right in phpMyAdmin.
Congratulations! You have successfully backed up your database / selected tables!
Step 2 - Restoring your database using phpMyAdmin
Note: Most good hosts provide phpMyAdmin (mySQL Administration). If you do not know where it is or even if it exists on your server, just get in touch with your host.
- Login to phpMyAdmin.
- Select the database you wish to use.
- On the navigation bar on the top select "SQL" (besides Export, Structure, Search, Query... etc.)
- You should now be presented with a little page which allows you to run SQL query/queries on the database, either by inputting the query/queries to the input box or by locating a text file on your computer.
- You now have 2 options: 1) Paste the SQL which you backed up earlier in the "Input Box" and click "Go" or 2) If you saved the file on your PC then use the option below the first one; Click Browse > Locate the File > Click "Go". (Note: Most servers set a "Max File Size" for uploading the SQL, the size appears beside the Browse button.)
- It may take sometime for the file to be uploaded and fully run, so give it a chance. Once it worked, it will bring you back to the same page and should confirm if all went well "Your SQL-query has been executed successfully: The content of your file has been inserted."
Congratulations! If all went well, you have successfully restored your backed up database!
Step 3 - Backing up using SSH
Note: Some hosts do not offer SSH access, I suggest contacting your host and asking him/her if SSH access is enabled and if so the details. A good program to use for connecting via SSH is PuTTY (Get it at: http://www.chiark.greenend.org.uk/~sgtatham/putty/). Don't know how to use it? Search on Google for a tutorial.
- Connect to your host via SSH, login and run: mysqldump --opt -u user -p dbname > {path}/backup.sql
- You will be asked to type out your password once you run that command, do so and click enter. It may take some time for it to respond, but once completed you should be brought back to where you started (bash/command line).
Congratulations! You successfully backed up your database using SSH.
Step 4 - Restoring using SSH
Note: Some hosts do not offer SSH access, I suggest contacting your host and asking him/her if SSH access is enabled and if so the details. A good program to use for connecting via SSH is PuTTY (Get it at: http://www.chiark.greenend.org.uk/~sgtatham/putty/). Don't know how to use it? Search on Google for a tutorial.
- Connect to your host via SSH, login & run: mysql -u user -p dbname < {path}/backup.sql
- You will be asked to type out your password once you run that command, do so and click enter. It may take some time for it to respond, but once completed you should be brought back to where you started (bash/command line).
Congratulations! You have successfully restored your database using SSH.
- DLow
SourceDLow Reviewed by DLow on . Backup/restore using phpMyAdmin/SSH This is just a short mini-tutorial explaining how to backup parts of the mySQL database using phpMyAdmin and also via SSH (Secure Shell) access. This tutorial should be of use to most people, as it's an important part of any website/forum maintenance. So, let's get started... Step 1 - Backing up using phpMyAdmin Note: Most good hosts provide phpMyAdmin (mySQL administration). If you do not know where it is or even if it exists on your server, just get in touch with your host. Rating: 5

 Register To Reply
Sponsored Links
Thread Information
Users Browsing this Thread
There are currently 1 users browsing this thread. (0 members and 1 guests)
Similar Threads
-
Unable to restore backup using Wp complete backup
By Jayzzy in forum Webmaster DiscussionReplies: 13Last Post: 25th Mar 2012, 03:32 PM -
Best plugin to backup and restore database ?
By matriX in forum WordpressReplies: 2Last Post: 16th Feb 2012, 06:47 AM -
SSH: how to restore backup in different account?
By Divvy in forum Server ManagementReplies: 4Last Post: 6th May 2011, 07:12 PM -
how restore the backup of the site
By deep.j1 in forum Webmaster DiscussionReplies: 9Last Post: 16th Feb 2010, 05:29 PM -
How to restore a full backup?
By ceekeigh in forum vBulletinReplies: 6Last Post: 23rd Oct 2009, 01:13 AM


 Staff Online
themaPoster - post to forums and...
Version 5.07 released. Open older version (or...